
How to Draw Ears
Welcome to this drawing tutorial, make sure to grab the worksheet below and print it out to help you practice. If you are brand new to drawing and want a more simplified version of the ear, you can find a line by line tutorial here.
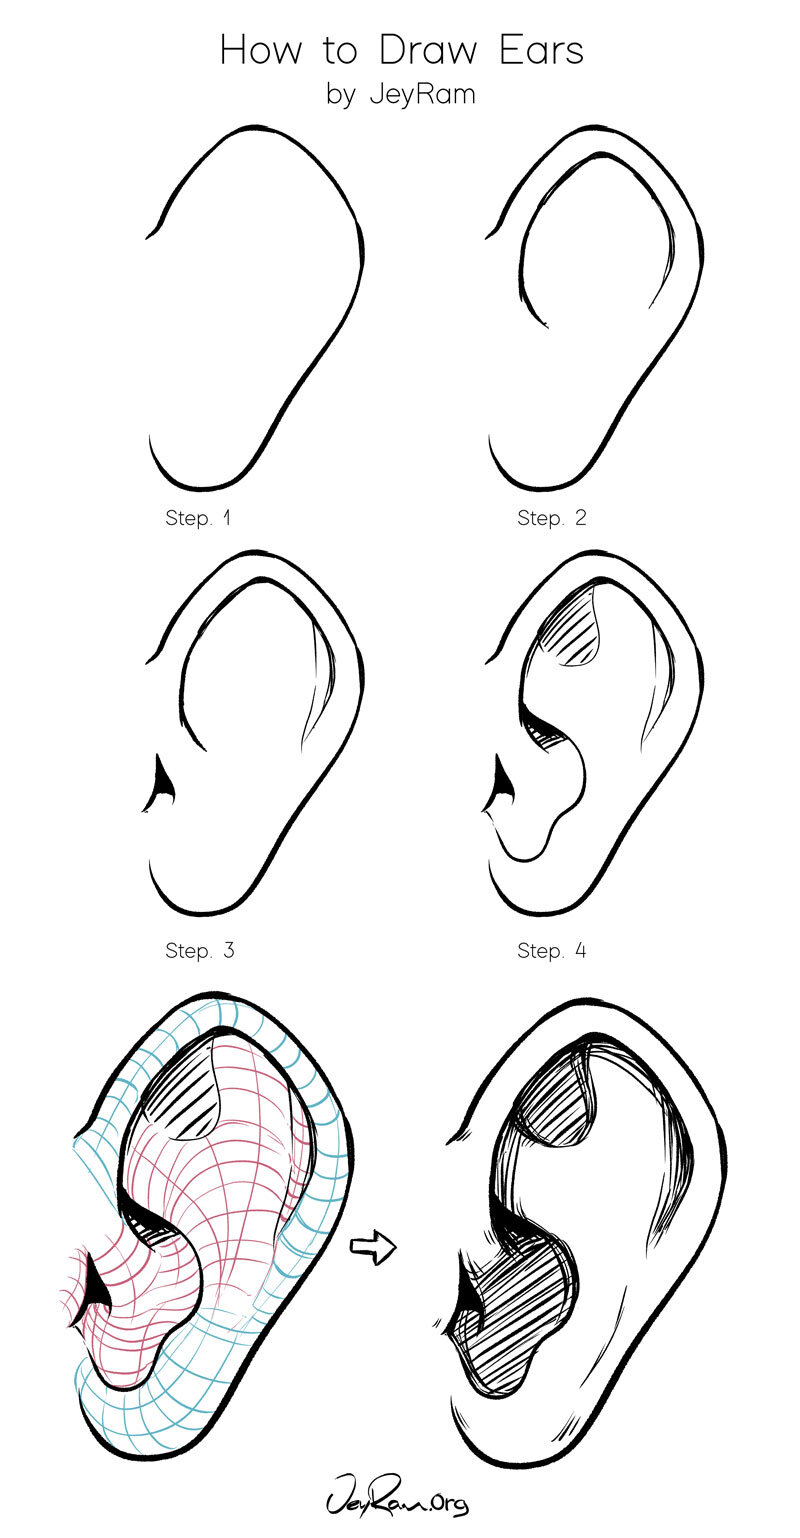
Step 1. Start by drawing the outer shape of the ear, pay attention to how the ear usually appears wider towards the top half and then get thinner towards the bottom. The top is almost like the roof of a house.
Step 2. Draw in the details of the rim of the ear, notice how in the example we can see that on the left side the line curves in towards the middle.
Step 3. Add the hole of the ear using two curved lines that meet at a point
Step 4. Draw in the shape of the basin area of the lower part of the ear, it will curve behind the rim that we drew in step 2 and curve around to connect with the bottom of the curve of the last step. Towards the top of the ear, you will see this ‘Y’ shape that is created by a semi-circle towards the top left. These lines vary a lot depending on the ear, I recommend studying a variety of ears to help you understand the overall shapes.
Step 5. Add in shading, pay attention to where the darks are and use the colored contour lines to help you see how the forms fold over one another.
Practice using references and also try to draw from memory to help you retain what you learn, switching back and forth is a great way to develop your visual memory. You can also grab the Ear Drawing Workbook below that will help you through the steps of drawing the ear.

Quickly learn how to draw a variety of subject matter and have tons of fun with me in this BIG bundle of courses!
This BIG Bundle Includes:
✓ Tons of drawing fun! <3
✓ Overcome Perfectionism
✓ Find Your Art Style
✓ Real time videos so we can draw together!
✓ 132 Pages of Figure Drawing Worksheets!
✓ 127 Pages of Portrait Drawing Worksheets!
✓ Flower Drawing Course; With Roses, Cherry Blossoms + More!
✓ FREE BONUS: Cayuties & Expressions ($30 Value)