
How to Draw a Nose
Welcome to this nose drawing tutorial! I have made some free worksheets (PDF) that you can print out to help you practice, feel free to grab them below and share them with anyone else you might know that would enjoy them~ ^.^
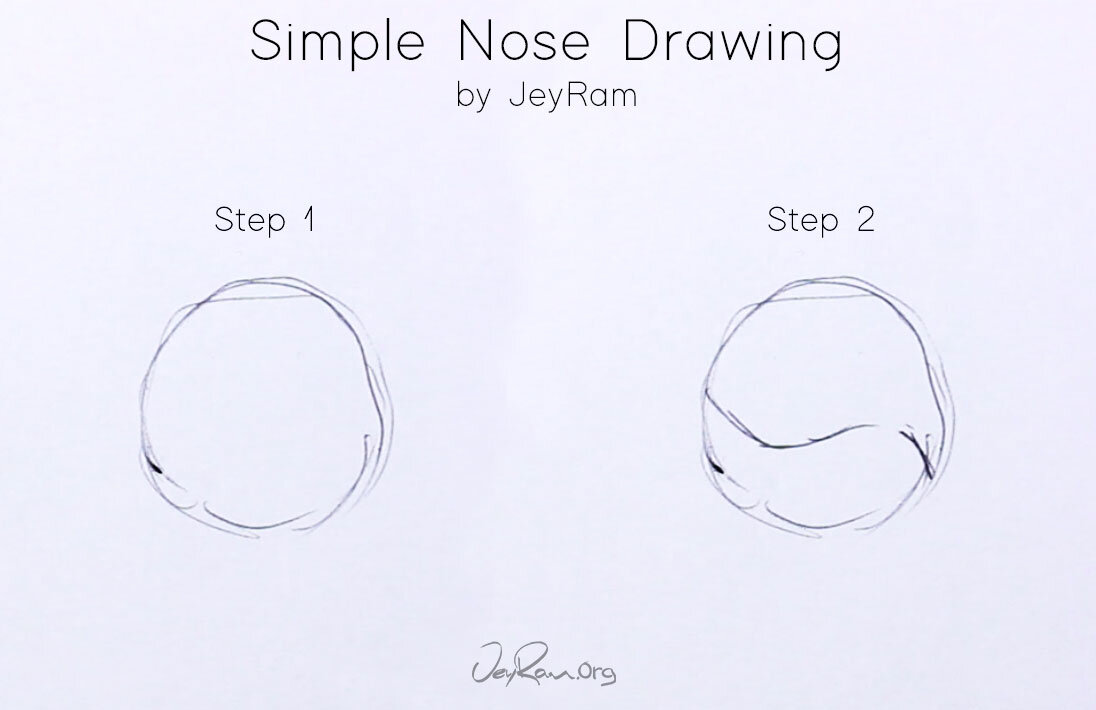
Step 1. Sphere
Start the nose by drawing a sphere that is the size of the drawing you want.
We think of this shape as a sphere instead of just a circle because we want to develop our understanding in 3 dimensions. Even if you are planning to draw in a very stylized manner, learning how the basic forms work will pay off tremendously. If you want to practice the basic forms you can check out the tutorial here (Open in a new window)
Step 2. Underside
Since we are drawing the nose at an angle we will see some of the underside of the nose, where the nostrils will go. Draw a curving line about 2/3rds of the way down that starts up on the left, comes down to where the center of the nose will be (the tip of the nose) then curving back up before coming back down at a steep angle.
Copy from the example image and try to see how this new line adds dimension to the sphere we drew in the first step. Take your time and erase as many times as you need to! No one gets this on their first try.
I recommend practicing this step multiple times before moving on, its much easier and quicker to learn if you focus on each step in isolation.
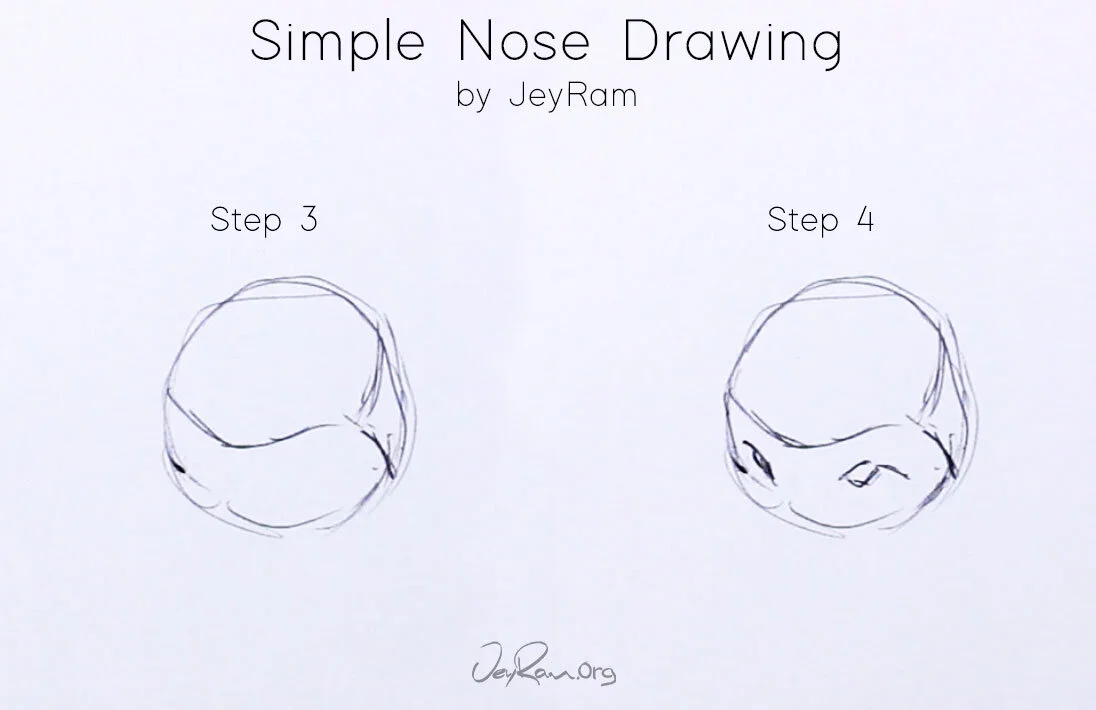
Step 3. Side Plane
If we did the second step correctly, this step should be fairly easy. Draw a line going up to the right from the right top corner of the line in the previous step. This should define the form of the nose
Notice how the nose can be simplified into this form, its a sphere with a top plane, a rounded bottom plane (or two flat planes connected at the center) & a side plane.
When you learn to draw anything new, consider how you can simplify down as much as possible before adding complexity, this will drastically increase the pace of your learning.
Step 4. Nostrils
When drawing the nostrils think of a large curving line that goes over the top, and a reversed curving line that is small and connects to the larger line. The trick with drawing simple nostrils is to keep them small and avoid using too many lines, two curved lines (or four straight lines) should do the trick.

Step 5. Refine
In the last step, I like to round out some of the corners and darken lines as I see fit. You can also erase away and redraw lines that didn’t turn out the way you wanted.
This is also a good opportunity to review your work and see how you could do it better next time, I like to write notes beside my drawings on what I did wrong so I can correct it the next time I draw.
That completes this drawing! :D I hope this was as fun for you to draw as it was for me to make this tutorial, thank you for letting me be part of your creative journey!
I also have nose tutorials from the side view here and the front view here. There are tons more free tutorials on the site you can check out below~!

Quickly learn how to draw a variety of subject matter and have tons of fun with me in this BIG bundle of courses!
This BIG Bundle Includes:
✓ Tons of drawing fun! <3
✓ Real time videos so we can draw together!
✓ 132 Pages of Figure Drawing Worksheets!
✓ 127 Pages of Portrait Drawing Worksheets!
✓ Flower Drawing Course; With Roses, Cherry Blossoms + More!
✓ FREE BONUS: Cayuties & Expressions ($30 Value)