

How to Draw the Head Looking Down
Welcome to this step by step tutorial! If you are learning how to draw the headshape I have a free worksheet below that will help you practice!
I also have a video tutorial that walks you through these worksheets below, and below that you can find the step by step for drawing a head that is looking down.
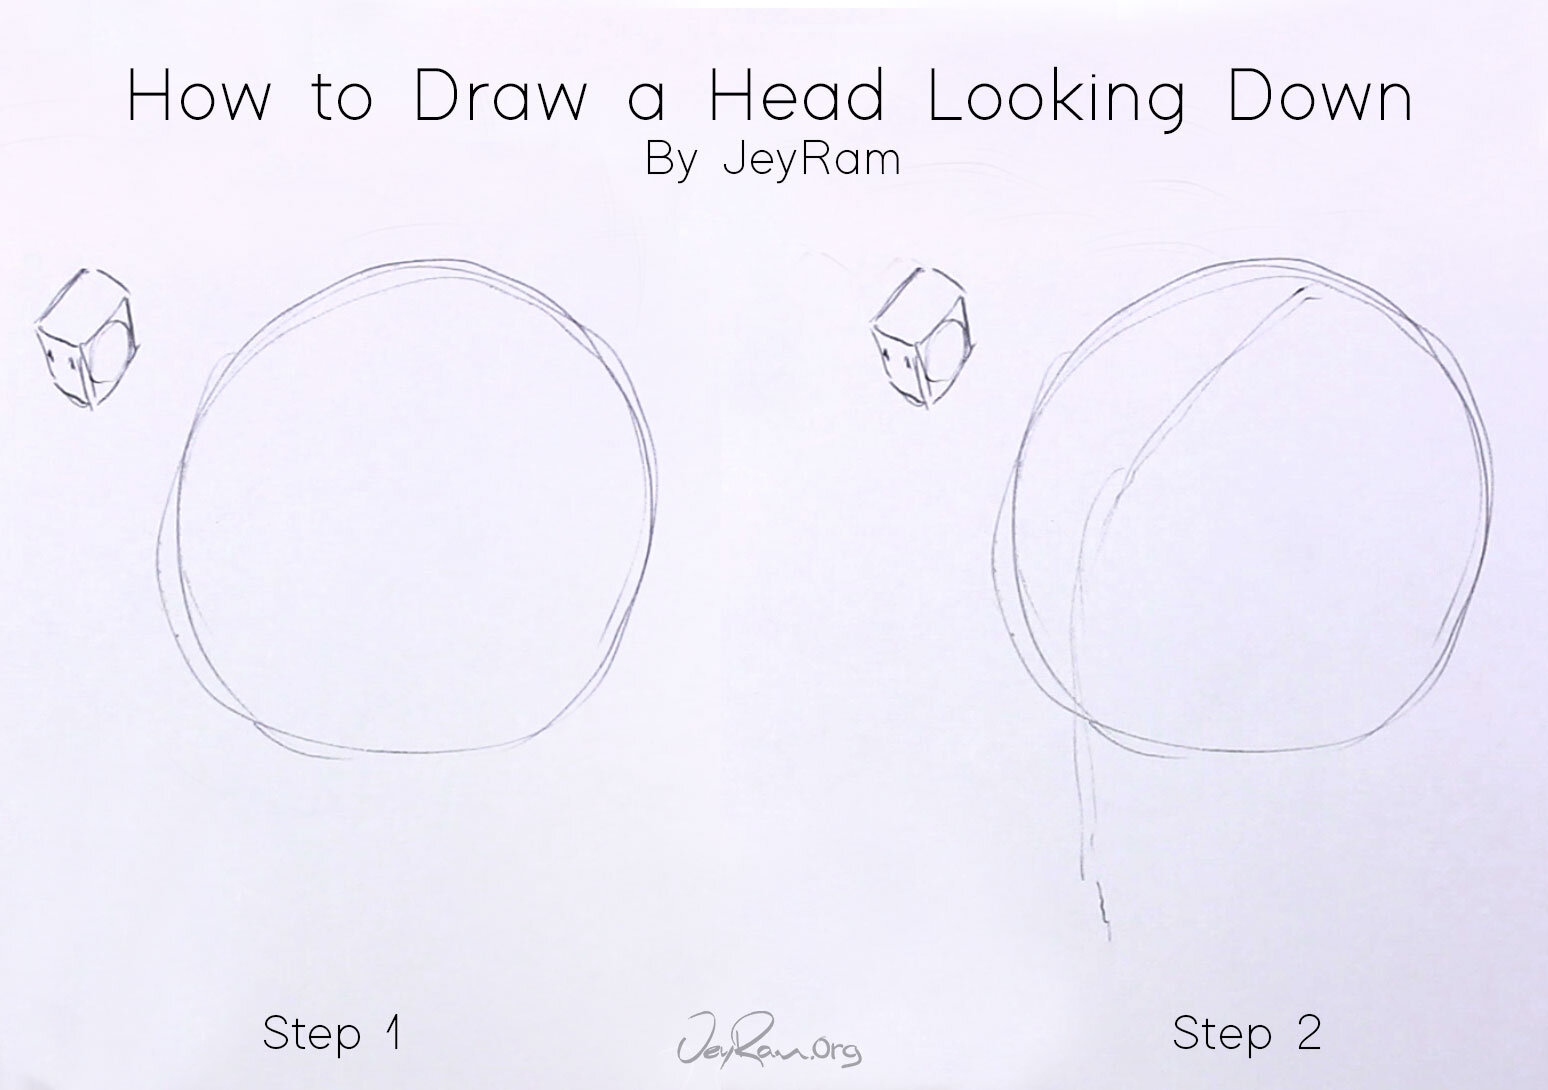
Step 1. Sphere
Start by drawing a sphere, I always start with this basic shape to establish a large portion of the skull. This method of drawing heads works very well at most angles and I highly recommend learning to draw these.
On the free worksheets, we go over the basic skill of drawing spheres, if this feels really challenging I would recommend taking some time to practice the first two pages of the worksheet before drawing the rest of the head.
At this step, I also draw a box that represents the orientation of the head I want to draw. In the example photo above you can see a tiny box with eyes and a circle on its flat side, this helps me visualize how the head will be drawn.
Using guidelines and developing a method of problem-solving will help tremendously in developing good drawing skills, copy the box onto your page (or separate page if you would like).
Step 2. Center Line
When drawing the head at odd angles, getting the centerline down becomes very important. We will be using this line to inform the placement of the features and the side of the head.
The box we drew earlier becomes very handy at this stage, notice how the centerline takes on a similar form as the box we drew. There is a direct correlation between the angle of the box and the centerline.
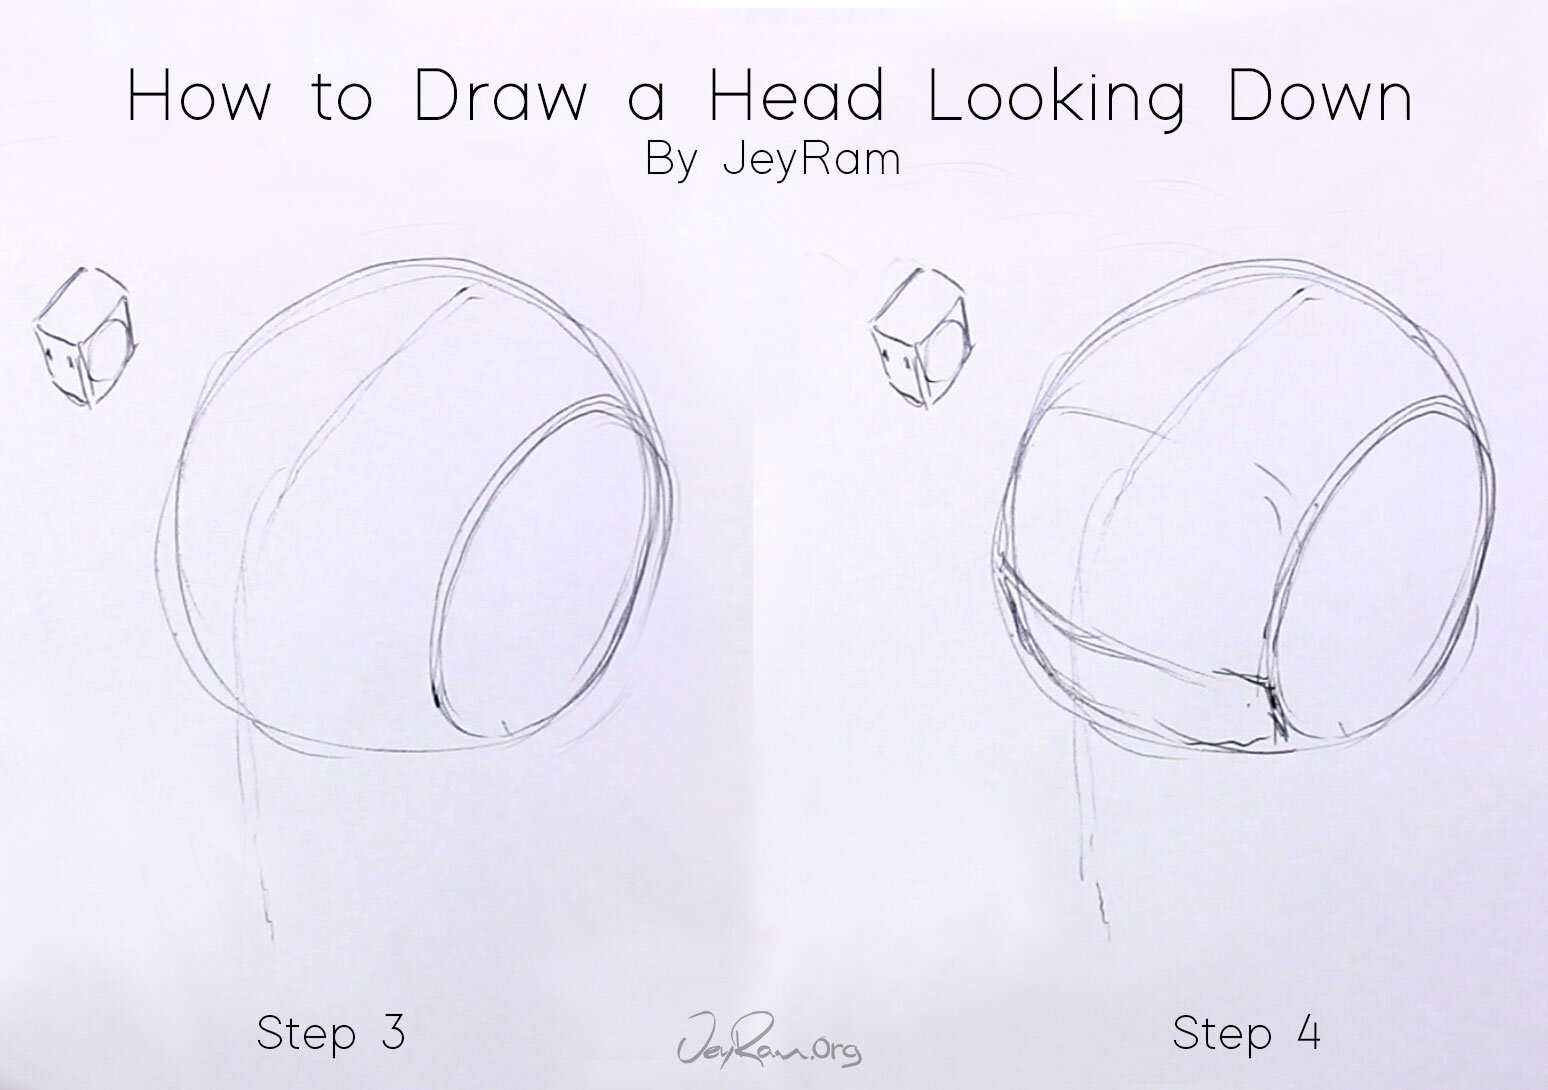
Step 3. Side of Head
Now we will add a circle that represents the side of the head (where the ears would go).
I am using the circle that I drew onto the box to help me understand what shape this circle should take to accurately match the orientation of the head.
This can be very tricky if you are first getting into drawing so take your time and erase away as much as you need to. On the free worksheets, we spend an entire page just practicing this step because it takes some time to get used to it.
Step 4. Eye Sockets
Add two parallel lines at the front of the circle that curves slightly to match the curvature of the sphere.
This space represents the area where the eyes will go because the head is tilted down (or we are seeing it from above) the eyes will be placed lower on the sphere. This means we see more of the top of the head compared to seeing the face from the front.
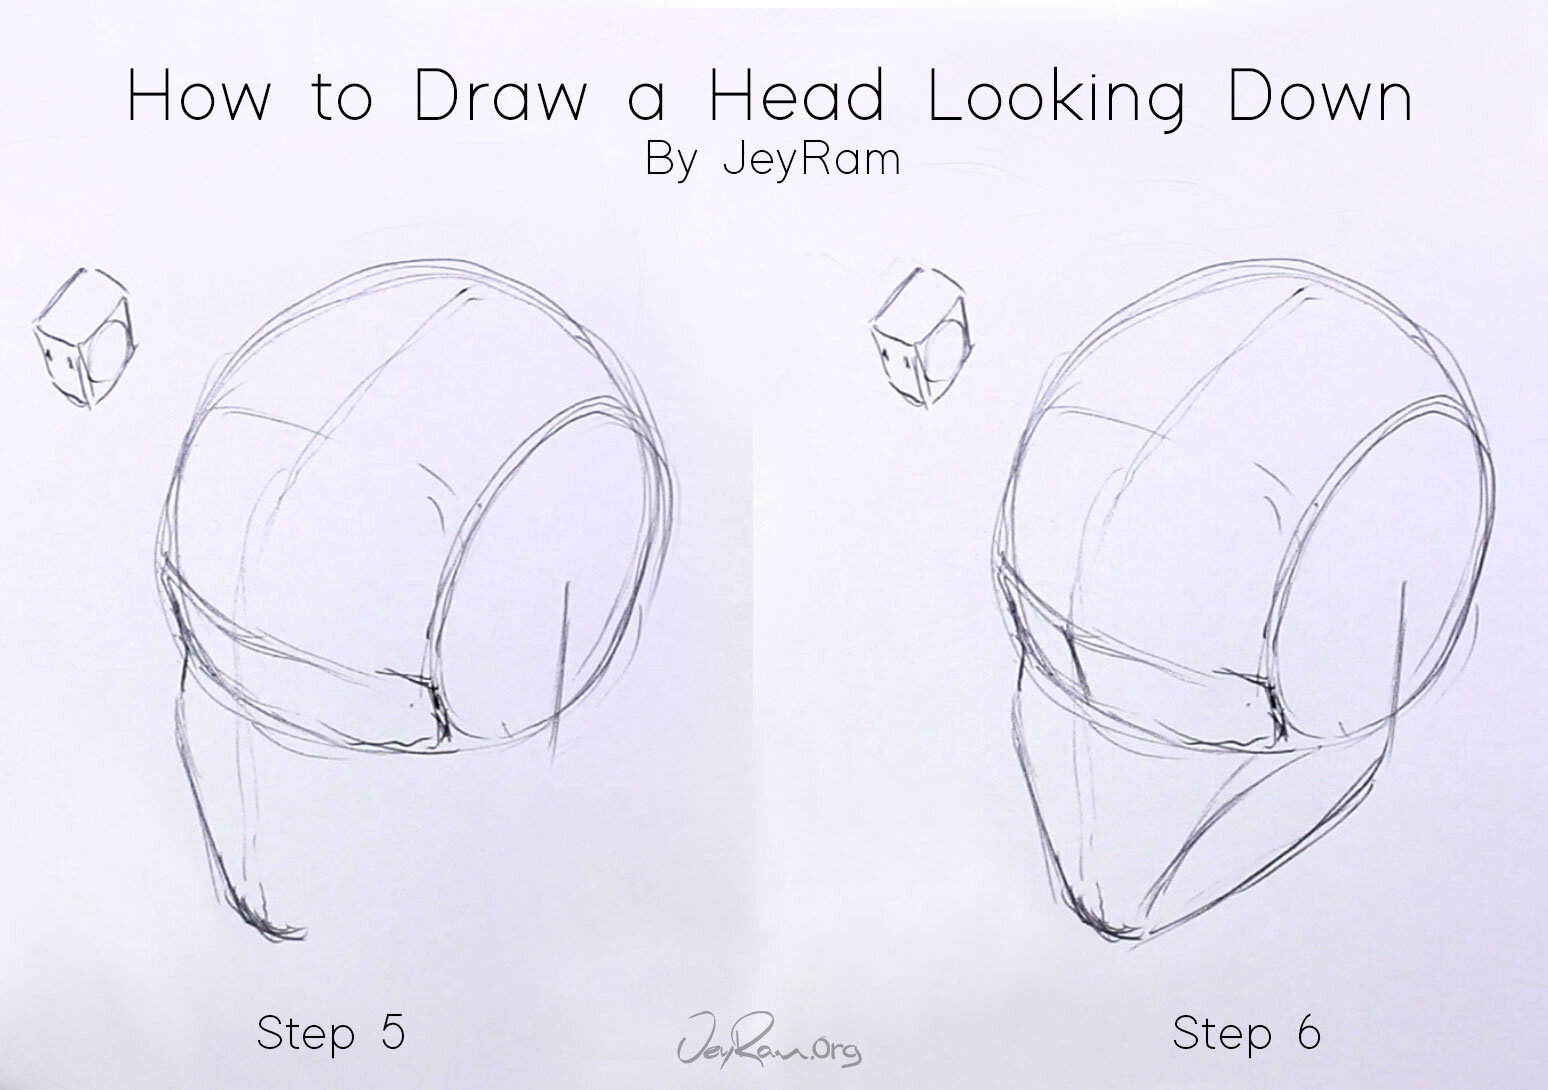
Step 5. Jaw & Chin
Add in the chin lower down on the centerline that we drew earlier, connect this line up towards the eye socket to establish the cheek on the far side.
Draw a vertical line dissecting the side plane we drew earlier, this gives us a guideline for drawing the ears when we add the features and also lets us know where to connect the rest of the jaw.
Step 6. Complete Jaw & Cheek
Connect the chin to the vertical line we drew in the last step to finish up the jaw. If you want a more feminine jaw you can make this more curved or keep it more jagged with straight lines to make it more masculine. Think of how traditional superheroes are drawn with box-like jaws versus females with rounded jaws.
Draw a line that curves from the edge of the eye sockets down towards the chin, this establishes the side plane of the face and where the cheek is.
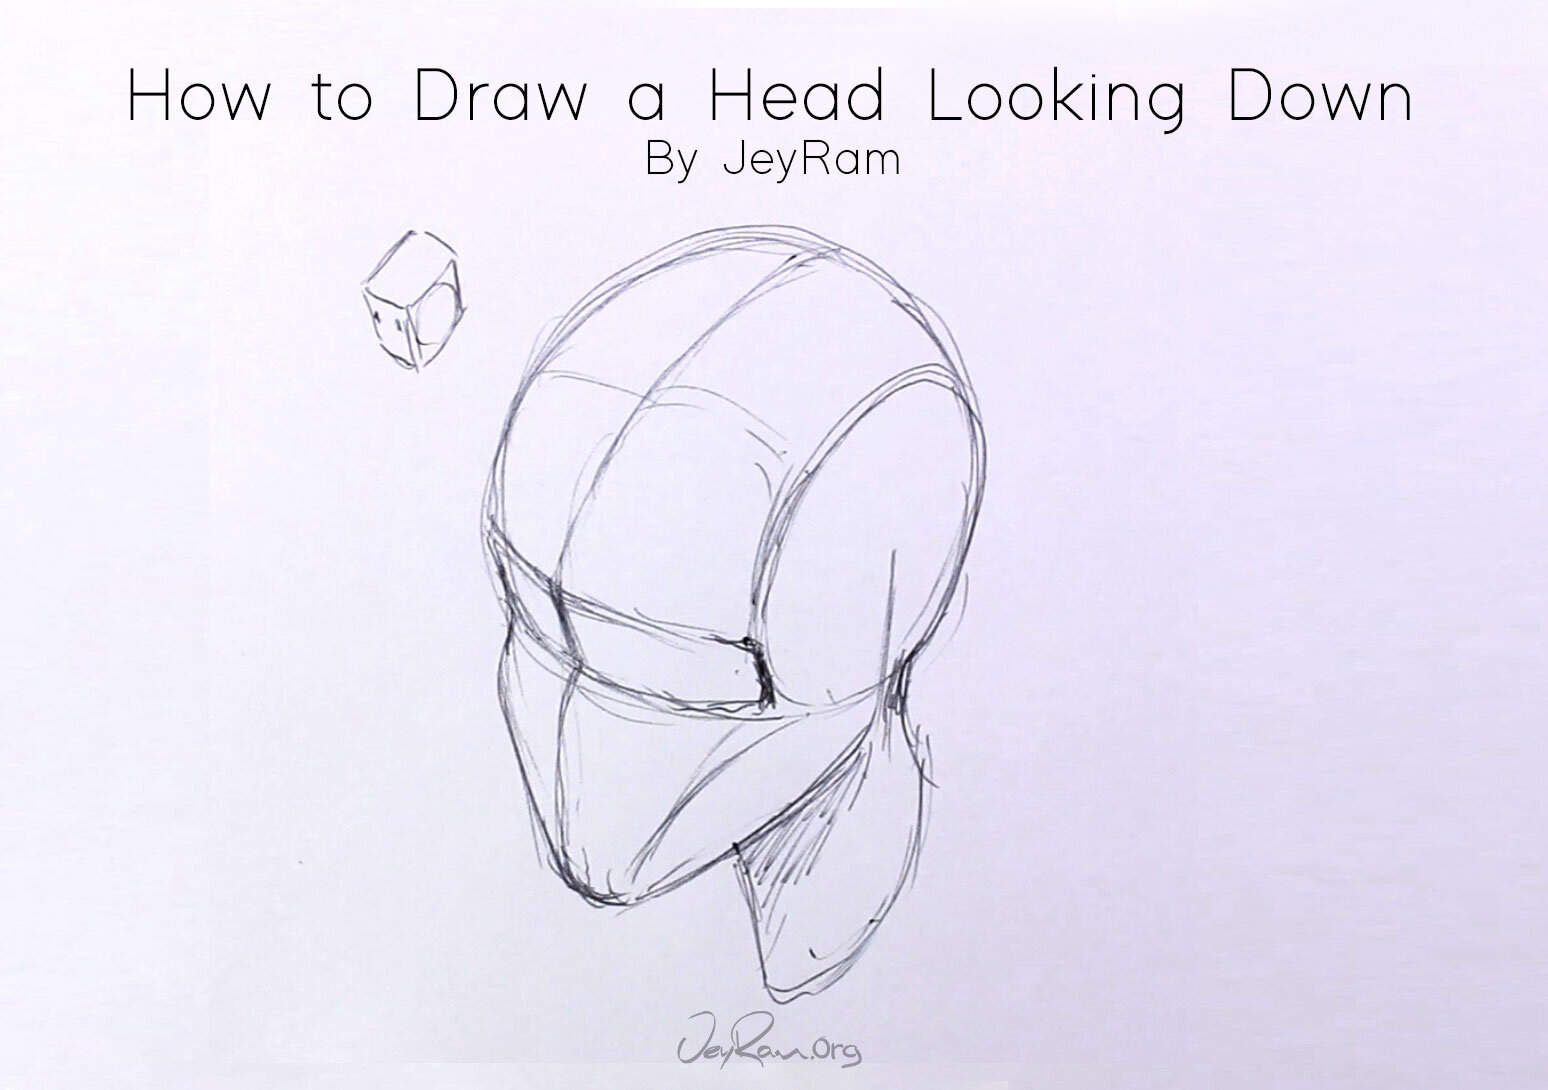
Step 7. Neck.
Add a cylinder for the neck and add some shading to give the drawing a bit more dimension.
This completes the drawing of the head shape when a person is looking down. There are tons more tutorials on the site that you can check out and I will be covering lots more topics over the next few months so stay in touch! I hope this was useful to you :D Thank you for letting me part of your artistic journey <3
Learning how to draw is a skill that needs to be continuously sharpened, think of it as a kitchen knife that gets dull over time if not taken care of. Keeping a daily practice will help you grow even if it is just a little bit of practice everyday. Use references and also push yourself to draw from imagination, use a variety of angles to challenge your drawing ability.
I made an 11 page worksheet of heads from different angles that I use to practice regularly, you can grab the PDF of it below if you have found that these worksheets are useful to you. I design these tutorials to help people actually develop the skills of drawing instead of just talking about theory. Learning a bunch of theory off video tutorials doesn’t actually help you learn how to draw.
I will be making more tutorials for all the features of the face and the rest of the anatomy, so stick around if you want more! :D

Quickly learn how to draw a variety of subject matter and have tons of fun with me in this BIG bundle of courses!
This BIG Bundle Includes:
✓ Tons of drawing fun! <3
✓ Real time videos so we can draw together!
✓ 132 Pages of Figure Drawing Worksheets!
✓ 127 Pages of Portrait Drawing Worksheets!
✓ Flower Drawing Course; With Roses, Cherry Blossoms + More!
✓ FREE BONUS: Cayuties & Expressions ($30 Value)